Contents
- Understanding Resin 3D Printing
- Importance of Supports in Resin 3D Printing
- Slicing Software for Resin 3D Printing
- Print Design for Resin 3D Printing with Supports
- Post-Processing of Resin 3D Prints with Supports
- Troubleshooting Support Issues in Resin 3D Printing
- Conclusion and Recommendations
- Frequently Asked Questions
Understanding Resin 3D Printing
Resin 3D printing requires precision – from designing the model to post-processing the print. To better understand, a closer look into details is needed. A table with stages of resin printing can help in fully grasping the process. These stages include:
- selecting resin & slicing software
- preparing print design
- adding supports
- printing
- cleaning supports & curing
Quality resins & slicing software are essential for accurate dimensions & high-quality finish. Model orientation before printing is also important to reduce wastage.
A study by Chen et al (2016) showed that post-processing can improve mechanical properties. Therefore, great care should be taken for optimized prints with durability. Lastly, without supports, your resin 3D print will fail.
Importance of Supports in Resin 3D Printing
To ensure a successful resin 3D print, you need to understand the importance of supports. With this section on ‘Importance of Supports in Resin 3D Printing’ with ‘Function of Supports’ and ‘Types of Supports’ as solutions, we will guide you on how to use supports effectively. We will briefly introduce the two sub-sections to give you an idea of the necessary information that you will get from them.
Function of Supports
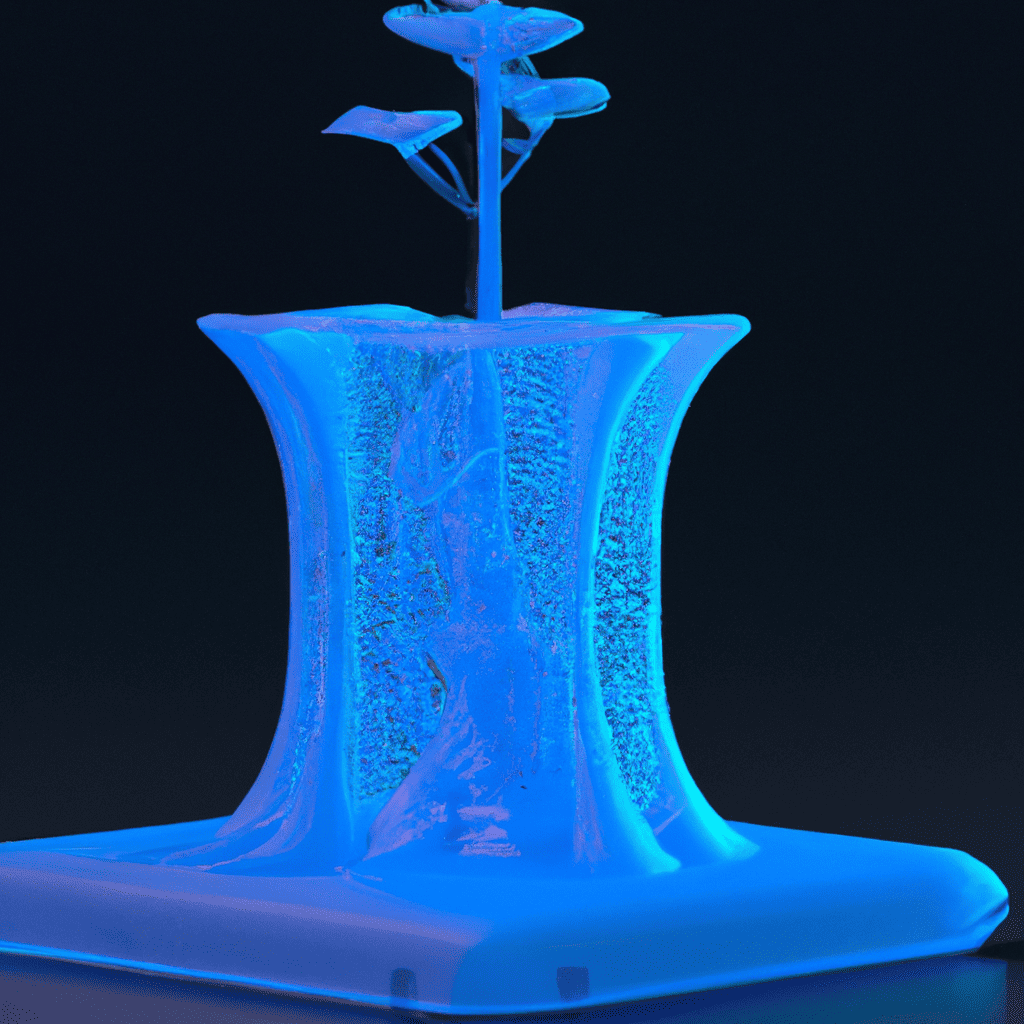
Supports are essential for successful resin 3D printing. If not present, models can warp or even collapse during printing. They act as temporary structures, holding up parts that are overhanging. This allows for the creation of intricate shapes and complex geometries.
Supports are built into the printer when needed. After printing, these can be removed by hand or with pliers. There may be small marks left behind, but these can be sanded down.
When printing, it’s important to customize settings to match your model’s needs. Different types of supports, like tree-like or block, can affect how well your prints turn out. Orientation and print speeds also matter – slower speeds around overhangs and ventilation between layers help ensure quality prints.
Types of Supports
When it comes to 3D printing with resin, supports are a must-have. They help keep the object stable and prevent deformations during printing. Depending on shape and complexity, different types of supports can be used. Like:
- Touching supports that directly connect to the print
- Tree-like supports that attach from a central point and branch out
- Linear supports that run parallel and are easy to peel off
- Cubic supports for models with overhangs that need precise support
It’s important to consider the overall design when selecting supports. For example, tree-like supports for round objects, linear for vertical prints, and cubic for intricate details. Interestingly, supports weren’t initially needed in resin 3D printing. Now, they are crucial for high-quality output. They provide extra stabilization and give users more control over their final product’s form and functionality. Slicing software for 3D printing requires patience – but having a degree in engineering helps too!
Slicing Software for Resin 3D Printing
To generate stable supports for your resin 3D prints, you can use slicing software to control the geometry and placement of supports. This section on “Slicing Software for Resin 3D Printing” with sub-sections “Use of Slicing Software in Support Generation” and “Popular Slicing Software for Resin 3D Printing” will provide solutions for effective support generation and the most popular slicing software for resin 3D printing.
Use of Slicing Software in Support Generation
Slicing Software is essential when it comes to Generating Supports in Resin 3D Printing. Get to know the features of the most popular software: Chitubox, PrusaSlicer, and Cura.
Chitubox: Automatic and Manual Support Generation, Photon Validation Test, Gcode Analyzer, Slicing Customization.
PrusaSlicer: Auto Support Generation, Part Splitting, Variable Layer Height, Advanced Infill and Speed Control.
Cura: Customizable Support Settings, Versatile and User-Friendly Interface, Auto Supports with Tree Structures.
These features make it easier to achieve better results. Validation tests and customization options provide the best print quality. It’s user-friendly and saves time!
Forgetting to run the validation test before printing can result in failed prints. But slicing software helps avoid this. So let’s print killer unicorns and other cool stuff!
Popular Slicing Software for Resin 3D Printing
For those looking to get into resin 3D printing, selecting the right slicing software is key. The wrong one can lead to poor print quality, inefficiency, and cost. Here’s a guide to popular slicers, with tips on how to use them optimally.
Take a look at this table. It outlines the top slicer options, plus their features, compatible printers, user-friendliness, and community support.
| Slicer Software | Features | Compatible Printers | User-Friendliness | Community Support |
|---|---|---|---|---|
| Chitubox | Advanced Supports Generation , Hollowing | All Major Brands | Beginner-friendly | Robust User Forums |
| PrusaSlicer | Automated Bed Leveling , Filament Tracking | Prusa i3 MK3S | Interactive UI | Active GitHub Repo |
| Lychee Slicer 2 | Mechanized Tree Supports System | Phrozen Printers | Intuitive workflow | Supportive User Groups |
Remember that each software has unique features. Try them out to find the one that fits your needs.
Also, adjust the settings like layer height and exposure time according to your printer and desired outcome.
Finally, keep the software up to date and check for any bugs in system updates to avoid issues during printing.
Supports are like the friends who help you stay upright after a night of heavy resin printing.
Print Design for Resin 3D Printing with Supports
To ensure successful resin 3D prints, you must print with supports. In order to do that, you need to master print design for resin 3D printing with supports. This includes understanding the importance of good print design and following basic design guidelines for adding supports, which we will discuss in detail.
Importance of Good Print Design
Designing for 3D Resin Printing with Supports is key to success. It should be carefully planned, precise and efficient to reduce errors, misprints and wastage.
Optimizing orientation, adding enough supports based on the model’s geometry and depth, adjusting print settings, and resolving structural issues must be taken into account. This results in improved efficiency, time saved, and a high-quality end product.
Software should be used to check and modify designs before printing. This saves time and resources by spotting any errors or defects early on.
Pro Tip:
Try to minimize use of support material while maintaining the product’s integrity. Follow these design guidelines to become a loyal friend to your prints!
Basic Design Guidelines for Adding Supports
Designing for Resin 3D Printing with supports needs some basic steps. These will help ensure good quality output, and also stop any damage or warping to the printed part.
Here is a 4-Step Guide to understand basic design rules for adding supports:
- Begin by designing the part, knowing that small features, acute angles, and tight spaces can be tricky to print without support.
- Then, use the ‘automatic support generation’ in most slicing software. This lets users select which supports to add or remove for their 3D model.
- Be sure the base of the print has enough surface area; this is necessary for the stability of the printed model. Thin stands could break away from the build plate due to suction forces between resin layers and FEP film of vat during each layer exposure and separation.
- Finally, check there’s enough spacing and density between supports. Optimize cross-sectional area contact between them with a minimum deviation angle (30°) from vertical drop lines of parts. Also, make sure part’s edges aren’t parallel or tangential to the horizontal FBW(Flat Build Width).
It’s worth knowing that not every model needs supports when printing with resin systems. But, it’s important to understand these simple steps for a well-supported resin-printed object.
Did you know? “Resins were used in ancient times to preserve objects like mummies.” [Source: History] Why stick to plain finishes for your resin 3D prints when you can add texture with post-processing?
Post-Processing of Resin 3D Prints with Supports
To ensure a successful post-processing stage of your resin 3D prints after using supports, follow these simple steps in order to remove the supports safely and clean off the support residue. In this section, ‘Post-Processing of Resin 3D Prints with Supports’, we’ll cover the sub-sections ‘Removing Supports Safely’ and ‘Removing Support Residue’.
Removing Supports Safely
Working with resin 3D prints? Let’s remove those supports! Here’s the plan:
- Spot the connection points between supports and the model. Cut away extra resin and pluck them off with pliers or tweezers.
- If any small or delicate parts may break while removing supports, reinforce them with extra resin first.
- When all supports are gone, smooth out any rough surfaces by sanding.
Remember – different resin and print settings affect how easy or hard it is to take ’em off. Try different techniques and materials to find what works best for your project. Plus – use supports only when necessary, adjust print settings to reduce supports, and take your time. Goodbye supports, hello clean prints – the only residue I want is from a good night out!
Removing Support Residue
When working with resin 3D prints, getting rid of support residue is a key post-processing step. These supports hold up the model shape during printing, and must be taken off thoroughly for a perfect outcome.
Follow this 4-step procedure to effectively remove support residue:
- Look over the print for any support structures.
- Use cutters or pliers to break off any excess material.
- Sand down the remaining residue with fine sandpaper.
- Finish up with a cleaning agent, like isopropyl alcohol, to take off any debris.
It’s essential not to miss any support material – it can make your final product look unfinished and lower its quality. Don’t be too quick to skip over any steps – removing supports inaccurately will damage the print surface and create defects.
Fun fact: Resin 3D printers use liquid resin instead of filament, which is usually used by other 3D printers. (Source: MakerBot) Supports in resin 3D printing are like party guests – you have to take care of them, but they can be a real burden.
Troubleshooting Support Issues in Resin 3D Printing
To troubleshoot support issues in resin 3D printing, you need to know how to use supports correctly. In order to achieve successful prints, it’s crucial to understand the slicing software and its impact on support structures. This section, ‘Troubleshooting Support Issues in Resin 3D Printing’ with ‘Common Support Issues’ and ‘Solutions to Common Support Issues’ as sub-sections, will guide you through the process of designing effective support structures and addressing issues that may arise during the printing and post-processing stages.
Common Support Issues
Resin 3D printing requires support – but there are challenges.
Common ones are:
- Too little support
- Careless placement
- Too much support
- Supports break during printing
Adjusting support length and angle can help. Manually adding supports can balance careless placement. Removing extra supports gives a smoother finish.
Remember your printer’s unique aspects when troubleshooting.
An artist had trouble with prints not sticking to the build platform. Thinner supports were the problem. Making them thicker fixed it. Get perfect resin prints with these simple solutions.
Solutions to Common Support Issues
When it comes to 3D printing with resin, support issues can occur. From poorly attached supports to wrong placement, there are solutions.
- Check orientation carefully – inadequate orientations can lead to support problems or failed prints.
- Optimize settings – Tweaking parameters, like lift speed and distance, can reduce support needs and improve print quality.
- Examine supports – Check the integrity of supports before removing them. This is important to avoid damage to the print and printer.
Remember: Resins have different cooling times and suitability for geometries.
Pro Tip: Have a separate work area specifically for resin. Ensure proper lighting, ventilation, and safety equipment like gloves and goggles are available.
Conclusion and Recommendations
This piece has examined the nuances of resin 3D print supports. We’ve discussed the importance, slicing software, and print design. We advise auto-generated supports with manual modifications where needed and experimenting with support density and angle settings. We also shared post-processing tips, such as removing extra resin and sanding.
It is crucial to remember that incorrect support placement or removal can harm the final outcome. Testing and caution are vital.
We haven’t yet mentioned how users can avoid support-related mistakes during post-processing. Our suggestion is to wear nitrile gloves when handling 3D prints after processing. This reduces the risk of contamination from chemicals and fingerprint smudging.
A 2021 research paper by Althobaiti, Wang, & Zhao reveals that “Supports’ printing time increases in proportion to the model height.” Thus, it is paramount to factor in printing time when selecting supports.
Frequently Asked Questions
1. What are supports in resin 3D printing?
Supports are structures that are added to 3D models before printing to prevent them from collapsing or deforming during the printing process. These supports act as a scaffolding, providing extra stability to the model being printed.
2. How do I know where to place supports on my model?
Slicing software used for resin 3D printing automatically generates support structures based on the complexity of your model, but it’s important to also review and adjust them before printing. You should place support structures at areas where your model overhangs.
3. What are some recommended settings for support structures?
The recommended settings for support structures include a support density of around 40%, and a support angle of around 50 degrees. The size of the support structures should also be around 0.2 – 0.3 mm in diameter.
4. How do I remove supports from my resin 3D print?
Supports are typically attached to your model via thin support stems. These stems can be easily clipped or cut away using a pair of utility scissors or a sharp knife. Always wear safety goggles and gloves while removing supports, as small pieces of cured resin can break off during this process.
5. What are some post-processing steps for resin 3D prints with supports?
Post-processing steps for resin 3D prints with supports include cleaning away any residual resin, performing sanding and polishing, and applying a protective coating to your finished object. It’s important that you remove any excess cured resin and scuff away any rough spots before sanding, polishing, and sealing.
6. How can I design my resin 3D prints to minimize the use of supports?
If you want to minimize the use of supports in your resin 3D prints, you should consider designing your model with angles no greater than 45 degrees. This will prevent overhangs that require support structures. You can also adjust the shape of your model to create gradual curves and inclines that are less likely to require supports.