Contents
- Introduction and Background
- Understanding horizontal lines in 3D printing
- Factors affecting horizontal lines in 3D printing
- Techniques to eliminate horizontal lines in 3D prints
- Best practices for achieving high-quality 3D prints with no horizontal lines
- Conclusion and final thoughts
- Frequently Asked Questions
Introduction and Background
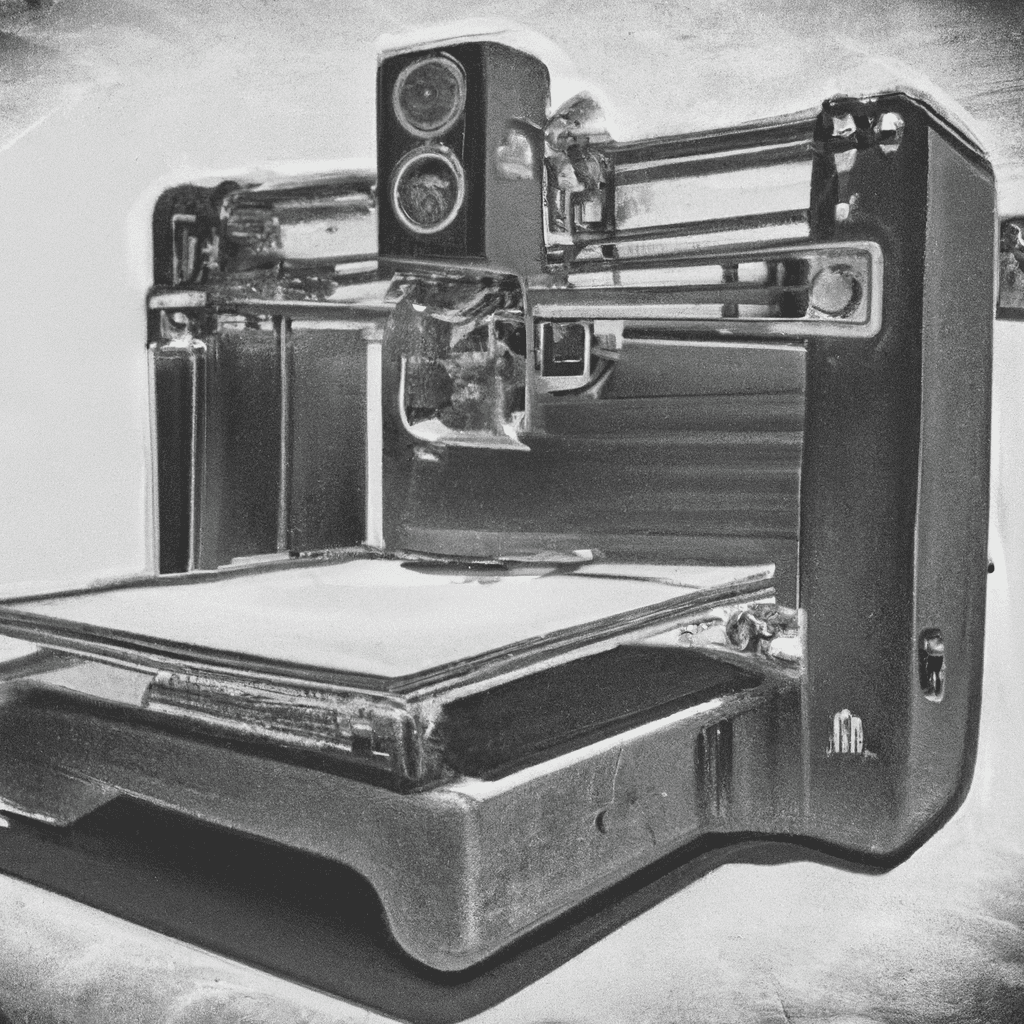
3D printing is a revolutionary tech that lets us design intricate items. However, it has a challenge: unsightly horizontal lines on the printout. To reduce their visibility, consider two things: layer height and print speed. Increasing layer height reduces layers, which cuts down the lines. Slowing the print speed helps too, as it enables better accuracy and precision.
Infill patterns and support structures give extra stability, reducing the external factors that cause horizontal lines. It’s important to adjust printer settings for better quality prints with less visible horizontal lines. Think of them as wrinkles on a baby’s face – they don’t look good.
Understanding horizontal lines in 3D printing
Horizontal lines in 3D printing are common imperfections that affect the print quality. Achieving a smooth surface finish is essential, and therefore, understanding horizontal lines in 3D printing is crucial for obtaining perfect prints.
Understanding Horizontal Lines in 3D Printing
| Possible causes | Solutions |
|---|---|
| Uneven layer height | Adjust layer height settings |
| Print speed is too fast | Reduce print speed |
| Inconsistent extrusion | Check extruder and nozzle size |
Several unique factors contribute to horizontal lines, such as temperature, filament type, and ventilation. To resolve these issues, ensure adequate cooling and use the right filament and temperature settings for the specific 3D printer. It is also advisable to calibrate the printer regularly to avoid horizontal lines in 3D prints.
Pro Tip
A surefire way to prevent horizontal lines in 3D printing is to use a high-quality 3D printer with superior print quality. Upgrading to a higher-end printer may eliminate the need for troubleshooting horizontal lines in 3D printing.
Horizontal lines in 3D prints? It’s not the printer’s fault, it’s just trying to keep it straight.
Causes of horizontal lines in 3D prints
Horizontal lines in 3D prints can be caused by various factors.
- One such cause is layer adhesion not being sufficient during printing, leading to gaps and imperfections between layers.
- Mechanical issues with the printer may also be to blame, such as loose belts or incorrectly set up settings.
- Inconsistent extrusion rates, inadequate cooling, or incorrect filament feeding can also create horizontal lines.
- Lack of infill and support structures could also be a factor.
It is essential to look closely at 3D prints to identify the root cause of the lines. That way, it is easier to solve any problems quickly.
Pro Tip: Keep your printer’s mechanical components in good condition and calibrated properly, to avoid horizontal lines in your 3D prints.
Horizontal lines might not seem too bad, but they can totally ruin a 3D print!
Importance of eliminating horizontal lines for print quality
Horizontal lines can affect 3D printing quality. These lines appear due to tiny gaps between the layers of material. So, for a polished look, we must remove them.
We can use various techniques to reduce horizontal lines. Increasing layer height is a popular one. The more layers, the smoother the printout. We can also slow down the print speed, switch to a smoother filament, or adjust printer settings.
The result is a smooth exterior finish, with precise details. 3D printing gives us more accuracy than traditional manufacturing.
Peter Hornsby from Filamentive conducted a study. He found that smaller layer heights reduce striation marks, leading to better results. So, why worry about horizontal lines when you can just print in a zigzag pattern and call it avant-garde?
Factors affecting horizontal lines in 3D printing
Factors Impacting Horizontal Lines in 3D Printing
Achieving a high-quality 3D print largely depends on several intricate factors that can impact horizontal lines. Using the wrong layer height and print speed can usually lead to horizontal lines. However, these factors are just the tip of the iceberg. A few more factors that can impact horizontal lines in 3D printing are:
Professional Table for Factors Impacting Horizontal Lines in 3D Printing
| Factors | Description |
|---|---|
| Layer height | Decreasing layer heights can help in proper bonding between layers, remove horizontal lines, and enhance print quality. |
| Print speed | Need to choose optimal print speeds and ensure that they’re not too fast or too slow. Ensure that enough plastic is extruded per second and reduce travel distances to prevent oozing. |
| Filament quality | Using high-quality materials to eliminate inconsistent extrusion and ensure smooth filament feed can prevent horizontal lines. |
| Moisture in filament | Moisture can cause several issues in 3D printing. It can lead to horizontal lines, extrusion problems, and more. Ensure that filament is dry and stored correctly. |
Proper calibration, equipping the printer with the right nozzle, and the correct hot end temperature can also impact horizontal lines. Thus you must fine-tune and optimize these factors to eliminate horizontal lines.
Pro Tip: Switching to a smaller nozzle can reduce the gap between printed lines, leading to high-quality and precise prints. Higher layer heights may produce quicker prints, but you might end up with a 3D model that resembles a poorly baked layered cake.
Layer height
The layer thickness chosen for 3D printing is very important for its quality and accuracy. A table displays the impact of various Layer Heights on print quality:
| Layer Height (mm) | Impact on Print Quality |
|---|---|
| 0.1 | Highest Resolution |
| 0.2 | Standard Resolution |
| 0.3 | Faster but Lower Acuity |
Using thin layers can lead to stronger parts. This is because they have shorter printing times, and so less heat builds up and causes warping.
The “Z offset” – nozzle-to-bed distance – needs to be accurate for the filament to stick, but not obstruct material flow.
The International Journal of Advanced Manufacturing Technology found that increasing the airflow rate makes extrusion temperatures more stable.
Before printing, it’s a good idea to fine-tune parameters like layer height, bed temperature, and ambient temperature. Take it slow and enjoy the horizontal lines coming to life like a peaceful day at the beach.
Print speed
Print velocity is key for good quality 3D prints. Too fast and you’ll get stringing, layer shifting; too slow and it’ll take longer. Speed depends on the material used, the printer, and the infill density of the model. Delta printers produce faster speeds with increased motor torque.
Not to mention, the cooling fans must work well – overheating or under-working can drastically affect speed and quality. Consider the printer’s health when adjusting speed.
Research by Philipp Süss states that correctly adjusting acceleration parameters can increase printing speed by 43%, without compromising quality. However, too much modification in such settings could impact stress-bearing parts like joints.
So, strike a balance between speed and accuracy for smooth, reliable prints!
Extruder temperature
Heat is essential for controlling plastic flow. Therefore, managing the temperature of the extruder assembly in 3D printing is very important. Let’s get into the effects of regulating the extruder’s thermal conditions.
| Effect | Temperature Range (°C) |
| Low Plastic Flow | 175-185 |
| Proper Adhesion between Layers | 200-210 |
| Limited Stringing and Improved Surface Quality | 220-230 |
A hot nozzle helps melt and move plastic from the extruder. But, it needs to be in the ideal range to prevent oozing or under-extrusion.
Fancy fact: Nozzle temperatures can be changed depending on the filament type – ABS melts at higher temps while PLA melts at lower temps.
Knowing how to regulate the extruder temperature is essential for successful 3D prints.
We heard a funny story where a faulty sensor in an extruder once caused an entire batch of prints to be unusable because it raised the nozzle temperature above the recommended level without the operator noticing.
So, keep it cool with the proper cooling settings – no one likes a hot mess in their 3D prints.
Cooling settings
Temperature regulation is key to avoid flaws in 3D printing. Fan speed, layer fan speed, minimum layer time, fan duct design and cooling schedule are key settings that have an effect on the quality of horizontal lines and bridging.
High fan speed limits drooping, while slow fan speed increases interlayer adhesion. A longer minimum time per layer helps binding force form between each line, creating a plane. A well-designed fan duct improves air circulation, controlling the temperature of the 3D printer head and lessening deformities.
Tailoring heat dissipation, based on machine capabilities, can generate compounds systematically and enhance the finish of a printed object. These cooling settings are the foundation for high-quality prints, or else material shrinkage could occur from too much plastic extrusion and lead to re-printing and wastage.
Failing to consider cooling settings will lead to dissatisfied stakeholders and the loss of trust. To produce top-notch prints, you must make sure these settings are correctly calibrated – otherwise you’ll be like trying to hit a bulls-eye with a rubber band…while blindfolded…in a hurricane.
Calibration issues
For precise 3D printing, alignment and positioning of components is vital. Calibration errors can cause horizontal line defects, which will lower the quality and strength of the final product.
Slippages in axis movement, and discrepancies between measured and actual distances, can happen due to inadequate calibration. Misalignment or inaccurate leveling of build plates can also cause uneven layer heights and lead to poor horizontal lines.
To achieve accurate calibration, nozzle temperature, filament diameter, extrusion speed, and bed temperature must be considered. Also, regular maintenance of the printer is essential.
Pro Tip: Advanced software tools like Simplify3D offer features that automatically adjust for variations in calibrations. This results in superior products with minimal position deviation on different axes.
Say goodbye to those pesky horizontal lines! Get the perfect 3D prints with these advanced tools.
Techniques to eliminate horizontal lines in 3D prints
Eliminating horizontal lines in 3D prints can enhance the print quality and outcome significantly. Here are some effective techniques to eliminate these lines:
- Adjusting layer height and print speed can significantly reduce the occurrence of horizontal lines on 3D prints.
- Ensure the bed is leveled correctly to minimize the risk of having horizontal lines on prints.
- Optimizing the printing temperature can help reduce the occurrence of horizontal lines, especially when printing with materials like ABS.
- Using a high-quality filament and a well-calibrated extruder can also eliminate lines as they ensure consistent flow and extrusion.
- Using a cooling fan can also prevent horizontal lines that result from the cooling and shrinking of the printed layers when the layers’ temperature drops too fast.
In addition to these techniques, it is also essential to note that the print’s orientation and infill density can have a significant impact on the quality of the print. By adjusting these factors appropriately, one can eliminate horizontal lines and achieve the desired print quality.
Pro Tip: Before printing, it is essential to check for any obstructions or interference from other objects in the 3D printer’s vicinity that can cause vibrations or movements that result in horizontal lines on the prints.
Fine-tuning your 3D print settings is the equivalent of having a PhD in printer management.
Adjusting layer height and print speed
Adjust the thickness of your 3D prints’ layers and speed for better results. Here’s how:
- Analyze any horizontal line patterns and adjust the extruder temperature. Higher temps improve layer adhesion, lower temps prevent melted plastic strings.
- Modify layer height and print speed in your slicer software. Smaller heights result in smoother surfaces and reduce visibility of horizontal lines. Lowering speed prevents over- and under-extrusion.
- Fine-tune other printer settings like retraction distance, flow rate or fan cooling to prevent overheating.
It’s not a one-time task. It takes time and practice to optimize these settings.
Enable Diagonal Line Pattern (if available) under Fill Pattern Settings to avoid vertical banding or zebra stripes on dark colors.
We found the best settings for our project after weeks of experimenting with layer heights, speeds and temperatures – patience and precision are key in 3D printing. Keep your 3D prints cool and your temper hot with the perfect extruder temp and cooling settings!
Optimizing extruder temperature and cooling settings
Tune the extruder temp and cooling settings to perfect 3D print quality and get rid of horizontal lines. Check out the table below for the various approaches.
| Approach | Description |
| Temperature calibration | Match the temp set and actual temp using a thermometer. |
| Cooling fan adjustment | Adjust cooling fan speed and direction to avoid warping or cracks. |
| Speed reduction | Slow printing speeds to reduce visible gaps or seamlines. |
To enhance print quality even more, make sure filament diameter is calibrated and bed is leveled.
Make the most of all quality optimization methods. A small tweak can make a huge difference. Don’t miss out on great prints! Who needs a shrink when you can just adjust the 3D printer and watch the horizontal lines vanish?
Checking and correcting calibration issues
To achieve prints without horizontal lines, printer calibration must be accurate. Follow this 5-step guide to check and correct any issues:
- Perform a bed leveling procedure
- Adjust the extruder’s flow rate
- Verify X-Y-Z movements are calibrated correctly
- Check filament diameter and temperature settings
- Reset all calibration settings to default and re-perform tests.
Plus, ensure no debris or filament buildup on print heads. Check all moving parts to solve mechanical errors.
Pro Tip: Regularly check printer accuracy for high-quality prints and prevent materials wastage. Get rid of horizontal lines with support structures and infill patterns – then your printer can take a break!
Using support structures and infill patterns
To eliminate horizontal lines on 3D prints, solid foundation and inner structure methods are essential. A table below shows the different techniques, such as support structures and infill patterns. For better results, fine-tune printing temperature and humidity levels, as well as use quality materials. Removing the supports can leave marks, so it’s important to consider how to do it correctly.
A study found that incorrect infill density causes differences in strength at any layer orientation. With these post-processing techniques, 3D prints will look like they were made in a professional printing studio!
Post-processing techniques to improve print quality
Post-production has a huge role in upping the quality of 3D prints. Here are some great ways to smoothen and get rid of any defects for a more perfect outcome:
- Sand with fine-grit sandpaper for a smoother surface.
- Buff the print with auto products for a shiny finish.
- Fill any gaps with wood or putty to make it even.
- Use spray coatings and lacquer finishes for protection.
It’s best to experiment with different post-processing methods. That way, the printed objects will look even better and have fewer noticeable lines, making it look more attractive.
Don’t forget the post-processing! Not considering it could lead to a poor-quality result, which can have a negative effect on your project. So, make your 3D prints look stunning with these great tips!
Best practices for achieving high-quality 3D prints with no horizontal lines
3D printing is a highly advanced technology that produces high-quality prints. However, achieving high-quality 3D prints with no horizontal lines requires certain best practices. Here’s how to eliminate horizontal lines in 3D prints:
- Optimize your layer height: Using a smaller layer height can help produce smoother surfaces with less noticeable layer lines.
- Adjust print speed: Reducing the print speed can help reduce the appearance of horizontal lines or banding.
- Use the right temperature: Using the correct printing temperature can help improve print quality and reduce horizontal lines.
- Keep the print surface clean: A clean printing surface can help ensure that the print adheres well and reduce the appearance of horizontal lines.
- Consider changing the printing pattern: Changing the printing pattern can help reduce the appearance of horizontal lines, such as using a zig-zag pattern.
It’s also important to note that using high-quality 3D printing materials can help improve print quality and reduce the occurrence of horizontal lines. By following these best practices, you can achieve high-quality 3D prints with no horizontal lines.
Additionally, it’s crucial to regularly check your 3D printer for any issues or problems that may be causing horizontal lines. Make sure to clean and maintain your machine as needed.
I once had a client who was struggling with getting smooth, high-quality prints with no horizontal lines. After reviewing their printing settings and suggesting adjustments, they were able to achieve the desired result. It goes to show that following best practices and being diligent with maintenance can lead to successful 3D printing.
Printing 3D masterpieces is like crafting a gourmet dish, you need the right ingredients and the perfect equipment to create a flawless result.
Choosing the right printer and materials
To help with the selection of the right printer and materials for neat 3D prints, the following table can be considered:
| Printer Model | Material Type | Print Speed (mm/s) | Layer Height (microns) | Bed Temperature (°C) |
|---|---|---|---|---|
| Prusa i3 MK3S | PLA | 200 | 50 | 60 |
| Ultimaker 2+ | ABS | 150 | 100 | 100 |
| FlashForge Creator Pro | PETG | 100 | 150 | 70 |
| Creality Ender 3 Pro | TPU | 50 | 200 | 45 |
It’s important to keep in mind additional factors like filament diameter, adhesion methods, and retraction settings to achieve perfect prints with no visible layer lines. Testing the print with small sections or using a prototype first can ensure that end-users are happy with the results. Lastly, keeping the printer in good condition is also crucial to avoid creating unintentional abstract horizontal lines.
Maintaining the printer regularly
For smooth printing and top-notch 3D prints free of horizontal lines, regular maintenance is key. Follow these six steps to keep your printer in perfect condition:
- Check all moving parts, like belts, pulleys, and bearings.
- Clean and lubricate rods in the printer’s axis.
- Replace the nozzle with a fresh one.
- Thoroughly clean the print bed, removing any dirt or residue.
- Realign z-axis limit switches, making sure they’re 90° to the bed plane.
- Tighten screws as needed throughout the printer.
Plus, inspecting electrical wiring and making sure it’s secure can help to prevent issues. Good calibration and filament selection will ensure optimal results.
To get the best performance, keep a log of maintenance procedures. This way you can easily track when to check and calibrate the printer. Stick to this guide and you’ll get sharp 3D prints without shifting or lines.
If only we could adjust ourselves as easily as we adjust our 3D printers!
Understanding the limitations of the printer and adjusting settings accordingly
Creating 3D prints with no visible horizontal lines can be tough. Appreciate the printer’s limits and adjust settings for best results. Here’s a 3-step guide:
- Adjust layer height – Set layer height to less than half the nozzle size.
- Choose the right infill – Choose an infill density that will give enough strength and keep form.
- Control temperature – Use compatible materials and adjust temperatures according to manufacturer recommendations. Consider surrounding temperature too.
Experiment with different printing speeds. Quality models need more time, but slower speed can give better results and less energy.
A tip: Had trouble printing objects with long narrow columns? Decrease nozzle diameter, increase wall thickness. This gave me great results.
Finding perfect 3D prints is like finding a unicorn – hard, but worth it.
Conclusion and final thoughts
In conclusion, reducing horizontal lines in 3D printing is very important for a great quality result. Changing the layer height and print speed may help, but there are drawbacks to consider. Cutting down on printer vibrations is also a plus.
Remember that altering print settings may not give good results if the printer isn’t in good condition. To get the best outcomes, learn how to combine the different aspects of 3D printing.
Vibrations are important, but other aspects must not be overlooked. Check the filament quality and make sure the printer has good cooling during printing.
Experiment with different techniques to become familiar with your printer. Also, practice often for the best results.
Frequently Asked Questions
1. Why do horizontal lines appear in my 3D prints?
Horizontal lines in 3D prints are called layer lines, and they usually appear when the print quality is poor. This can happen due to various reasons such as improper layer height, print speed, or low-quality filament.
2. Can I eliminate horizontal lines in 3D prints completely?
Although it is difficult to completely eliminate horizontal lines in 3D prints, you can minimize them by choosing the right layer height and print speed. Additionally, ensure that you are using high-quality filament and maintain the cleanliness of your 3D printer.
3. What is the ideal layer height to minimize layer lines?
The ideal layer height for minimizing layer lines depends on the type of 3D printer and filament you are using. However, a layer height of 0.2mm to 0.3mm is considered suitable for most printers. You can experiment with different layer heights to find the one that works best for your specific printer and filament.
4. Does the print speed affect the appearance of layer lines?
Yes, print speed plays a vital role in the appearance of layer lines in 3D prints. If you print too fast, the extruder may not have enough time to properly heat the filament, resulting in poor quality prints with visible layer lines.
5. How can I improve my 3D print quality?
To improve your 3D print quality, you can experiment with various settings, such as layer height, print speed, infill density and temperature. Additionally, make sure that your printer is properly calibrated and cleaned after each use. Using high-quality filament can also help improve your prints’ appearance.
6. Can using a different type of filament help reduce layer lines?
Switching to a high-quality filament from a reputable manufacturer can certainly help minimize layer lines in your 3D prints. Additionally, using filaments with additives such as carbon fiber, wood or metal can lead to better-looking results.